This Barn Setup Schedule Is So Addictive, It's Been Called Farm Porn – You Won't Believe #1!
Have you ever found yourself losing track of time while perfecting your virtual drug empire in Schedule 1? You're not alone! The latest barn setup has players completely hooked, with many calling it "farm porn" due to its strangely satisfying and addictive nature. Whether you're a seasoned player or just starting out, this comprehensive guide will walk you through creating the most efficient barn setup that's taking the Schedule 1 community by storm.
Understanding the Power of the Barn Property
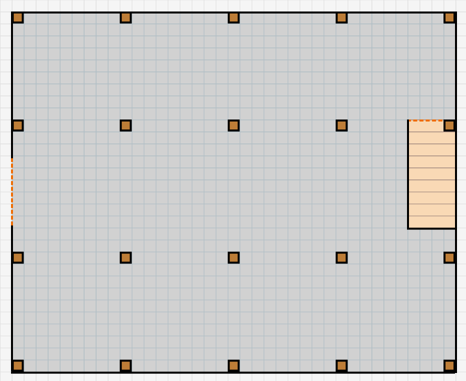
The barn stands out as one of the most valuable properties you can acquire in Schedule 1. Unlike smaller properties that quickly become cramped and limiting, the barn provides an expansive space that serves as the perfect headquarters for your growing drug empire. This larger footprint allows for sophisticated setups that would be impossible in more confined spaces.
However, this abundance of space comes with its own challenges. Many players find themselves overwhelmed when first stepping into their barn, unsure of how to maximize this vast area effectively. The open floor plan offers incredible flexibility, but without proper planning, you might end up with an inefficient layout that hampers productivity rather than enhancing it.
The Evolution of Barn Setups in Schedule 1
With the recent patch update in Schedule 1, the game has evolved significantly, particularly in how players can approach automation. Gone are the days when manual labor was your only option for production. Now, with fully automated cocaine production just a few tweaks away, players can create self-sustaining operations that run around the clock.
This shift toward automation represents a fundamental change in how successful players approach the game. Instead of being limited by your own time and effort, you can now build systems that work for you, allowing you to focus on expansion and strategy rather than constant micromanagement.
Building Your Ultimate Barn Layout
When planning your barn setup, the first consideration should be your production goals. Are you focusing on a single product, or do you want to diversify your operation? For maximum efficiency, many experienced players recommend setting up production lines for two different products, allowing you to hedge your bets and maximize your barn's potential.
- Tony Berlin
- Breaking Jeffrey Epsteins Leaked Documents Expose Elite Sex Ring Nude Photos And Client Names Inside
- Jonathan Penner Survivor
The layout of your equipment and tents plays a crucial role in efficiency. Some players prefer organizing tents in neat rows for easy access and maintenance, while others create clusters based on production stages. Another popular approach involves creating multi-level setups that utilize vertical space, particularly useful in the barn's high-ceiling environment.
Maximizing Employee Efficiency
You can only get so far by making and dealing your drugs by yourself in Schedule 1. Once you have enough money to hire workers, you can practically build yourself an automatic farm. The key to success lies in maximizing your employees' potential through strategic placement and workflow optimization.
Fully maxed-out employees working in a well-designed barn setup can produce significantly more than a poorly organized operation. This means that investing time in creating the perfect layout pays dividends in increased production and, ultimately, higher profits. The synergy between well-placed equipment and skilled workers creates a production powerhouse that can dominate the in-game market.
The Secret to Full Automation
The holy grail of barn setups is achieving complete automation. This involves creating a system where products move seamlessly from raw materials to finished goods without requiring constant player intervention. The recent patch has made this more achievable than ever, with tweaks that allow for smoother automated workflows.
To achieve this level of automation, you'll need to carefully consider the flow of materials through your barn. Raw materials should enter at one point and progress logically through each stage of production, with finished products exiting at a designated location. This creates an assembly line effect that minimizes bottlenecks and maximizes output.
Advanced Tips for Maximum Profitability
For players aiming to optimize their barn layout and automate production, several advanced strategies can help push your operation to the next level. Consider implementing a dual-production system that allows you to switch between products based on market demand, maximizing your profit potential.
Another key strategy involves creating dedicated zones within your barn for different production stages. This not only improves efficiency but also makes it easier to troubleshoot issues when they arise. By compartmentalizing your operation, you can quickly identify and address problems without disrupting your entire production line.
Common Mistakes to Avoid
Many players make the mistake of trying to cram too much into their barn without considering workflow efficiency. While it might seem logical to maximize every square foot of space, this often leads to congestion and reduced productivity. Instead, focus on creating a balanced layout that allows for smooth movement of both workers and materials.
Another common error is neglecting to plan for future expansion. As your operation grows, you'll need additional space for new equipment and production lines. Building with scalability in mind from the start can save you significant time and resources down the road.
The Community's Favorite Setups
The Schedule 1 community has embraced barn optimization with enthusiasm, sharing countless layouts and strategies online. From TikTok tutorials to detailed forum posts, players are constantly innovating and refining their approaches to barn management.
One particularly popular setup involves a modular design that allows for easy reconfiguration as needs change. This flexibility has made it a favorite among players who value adaptability in their operations. Another community favorite focuses on aesthetic appeal alongside functionality, proving that your barn can be both efficient and visually impressive.
Conclusion
Creating the perfect barn setup in Schedule 1 is both an art and a science. It requires careful planning, strategic thinking, and a willingness to experiment and refine your approach. Whether you're aiming for maximum automation, highest profitability, or simply the most satisfying layout, the principles outlined in this guide will help you achieve your goals.
Remember that the best setup is ultimately the one that works for your specific playstyle and objectives. Don't be afraid to experiment with different layouts and strategies until you find the perfect balance for your operation. With patience and persistence, you'll create a barn setup that's not just efficient, but truly addictive – the kind of setup that keeps you coming back to fine-tune and optimize, long after you've achieved your initial goals.