The Viral Leak: How To Put In Clip-On Hair Extensions In 60 Seconds!
Have you ever wondered how celebrities achieve those stunning, voluminous locks that seem to defy gravity? The secret might be simpler than you think! Clip-on hair extensions have taken the beauty world by storm, offering a quick and easy way to transform your look in minutes. But how do you actually put them in without spending hours in front of the mirror? Let's dive into the viral leak that's changing the hair game forever!
Understanding Clip-In Hair Extensions
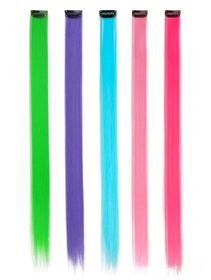
Clip-in hair extensions are the perfect solution for those seeking instant length, volume, and salon-quality results at home. These versatile accessories come with a discreet weft that keeps everything hidden, ensuring a natural look that's virtually undetectable. Whether you have fine or thin hair and are worried about clips being visible, there's no need to fret! Modern clip-in extensions are designed to blend seamlessly with your natural hair, regardless of texture or thickness.
The beauty of clip-in extensions lies in their simplicity and versatility. Unlike permanent extensions that require professional application and maintenance, clip-ins can be easily applied and removed at home, making them perfect for beginners and experienced users alike. With just a few simple steps, you can transform your hair from flat to fabulous in less than a minute!
The Step-by-Step Application Process
Before beginning the actual clipping process, one must start with clean, dry hair that has been thoroughly detangled and, preferably, lightly styled with heat tools for optimal blending. This preparation step is crucial for achieving a seamless look. Start by washing and conditioning your hair, then allow it to dry completely. Once dry, use a flat iron or curling wand to add some texture to your natural hair, which will help the extensions blend more naturally.
Now, let's break down the actual application process into easy-to-follow steps:
Section your hair: Create a clean, horizontal part across the back of your head, about an inch above the nape of your neck. Secure the upper portion of your hair with a clip to keep it out of the way.
Open the clips: Before placing the extension, open all the clips on the weft to prepare for application.
Position the weft: Starting from one end, place the weft along the part you created, ensuring it sits as close to the roots as possible without causing discomfort.
Snap the clips shut: Once the weft is in position, snap each clip shut, working from one end to the other. You should feel a secure hold.
Release and repeat: Release another section of your natural hair, create a new part about half an inch above the previous weft, and repeat the process. Continue this pattern until all wefts are in place.
Blend and style: Once all extensions are clipped in, gently comb through your hair to blend the natural and added hair. You can then style as desired, using heat tools if necessary.
Troubleshooting Common Issues
Even with the best preparation, you might encounter some challenges when applying clip-in hair extensions. Here are some common issues and how to address them:
Visible clips or wefts: If you can see the clips or wefts, try backcombing the roots of your natural hair slightly before clipping in the extensions. This creates a more secure base and helps hide the clips. You can also use a light mist of hairspray on the roots for added grip.
Extensions slipping out: This can happen if your hair is too clean or silky. In this case, try using some dry shampoo on your roots before application to add texture and grip. Additionally, ensure you're clipping the extensions as close to the roots as possible without causing discomfort.
Unnatural appearance: If your extensions look obvious or fake, it might be due to a mismatch in texture or color. Make sure you're using extensions that closely match your natural hair color and texture. You may need to style both your natural hair and the extensions together to achieve a seamless blend.
Maintenance and Care
To ensure your clip-in hair extensions last as long as possible and continue to look their best, proper maintenance is essential. Here are some tips for caring for your extensions:
Brush gently: Use a wide-tooth comb or a special extension brush to detangle your hair, starting from the ends and working your way up to avoid pulling on the clips.
Store properly: When not in use, store your extensions in a cool, dry place, preferably in a box or on a hanger designed for hair extensions to prevent tangling and damage.
Wash sparingly: Unlike your natural hair, extensions don't need to be washed as frequently. When you do wash them, use a sulfate-free, gentle shampoo and conditioner, and allow them to air dry.
Heat styling: While most high-quality extensions can withstand heat styling, it's best to use a heat protectant spray and keep the temperature on your styling tools moderate to prevent damage.
Regular checks: Periodically check the clips for any signs of wear or damage. Most clips can be replaced if they become loose or broken, extending the life of your extensions.
Conclusion
Mastering the art of applying clip-in hair extensions can truly revolutionize your beauty routine. With the right technique and a bit of practice, you can achieve salon-worthy results in the comfort of your own home, in less than a minute! Remember, the key to a natural look lies in proper preparation, careful application, and regular maintenance.
Whether you're looking to add volume for a special occasion or want to experiment with different lengths and styles, clip-in hair extensions offer a versatile and commitment-free solution. So why not give it a try? With these tips and techniques, you'll be well on your way to achieving the luscious, full-bodied hair you've always dreamed of. Happy styling!