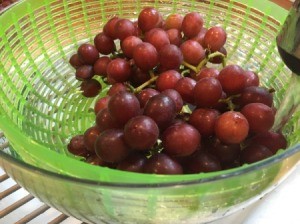
How To Clean Grapes So Thoroughly, They're Almost Nude – Watch This Viral Hack!
Have you ever looked at a bunch of grapes and wondered what's really hiding beneath that dusty white coating? That mysterious "bloom" might be natural, but what about the pesticides, dirt, and bacteria that could be lurking on your fruit? If you're tired of wondering whether your grapes are truly clean, you're not alone. Millions of people search for the best way to wash grapes every year, and the answer might surprise you.
The truth is, washing grapes isn't just about making them look shiny – it's about protecting your health and getting the most delicious flavor possible. But with so many conflicting methods out there, from quick rinses to elaborate soaking techniques, how do you know which approach actually works? Whether you're a health-conscious parent, a budget-savvy shopper, or simply someone who loves fresh fruit, learning the proper way to clean grapes can transform your snacking experience. Let's dive into the ultimate guide that will have your grapes so clean, they're practically naked!
The Science Behind Grape Washing: Why It Matters More Than You Think
When it comes to grape safety, the statistics are eye-opening. According to the Environmental Working Group, grapes consistently rank among the top fruits for pesticide contamination, with over 50 different pesticides detected on conventional grape samples. This isn't just about surface dirt – these chemicals can penetrate the grape skin and linger even after a quick rinse.
- Exclusivo Mira El Video Nude Filtrado De Abby Y Cesar Antes De Que Lo Eliminen Para Siempre
- Breaking Jeffrey Epsteins Leaked Documents Expose Elite Sex Ring Nude Photos And Client Names Inside
- Archie And Lilibet Photos 2024
But here's what most people don't realize: that white, powdery coating on grapes isn't necessarily harmful. Known as "bloom," this natural waxy substance actually helps protect the fruit from moisture loss and decay. However, it can trap pesticides and bacteria underneath, making thorough cleaning essential. The challenge is removing contaminants without damaging the delicate grape skin or stripping away beneficial compounds.
Food safety experts emphasize that improper washing can actually make things worse. Using soap or detergent, for instance, can leave harmful residues that grapes readily absorb due to their porous skin. Even plain water might not be enough to break down oil-based pesticide residues. This is why understanding the science behind grape washing is crucial for both safety and taste.
When to Wash Grapes: Timing Is Everything
One of the most common mistakes people make is washing grapes immediately after bringing them home from the store. While it might seem logical to clean them right away, food safety experts actually recommend waiting until you're ready to eat or use the grapes. Here's why: excess moisture is the enemy of fresh produce storage.
When grapes are washed and then stored, the added water creates the perfect environment for mold and bacterial growth. This can significantly shorten their shelf life, turning your beautiful bunch into a fuzzy mess within days. Instead, store unwashed grapes in the refrigerator's crisper drawer, preferably in a perforated plastic bag that allows for air circulation.
The ideal time to wash grapes is just before consumption or preparation. This ensures maximum freshness while still allowing you to remove all contaminants. If you're meal prepping or planning a party, wash the grapes no more than 2-4 hours before serving to maintain optimal texture and flavor.
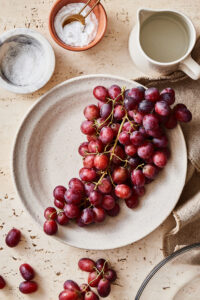
The Ultimate Grape Washing Method: Step-by-Step Guide
Now that we understand the "why" and "when," let's dive into the "how." The most effective grape washing method combines gentle mechanical action with the right cleaning solution. Here's the process that food safety experts and professional chefs swear by:
Step 1: Prepare Your Cleaning Station
Fill a large bowl with cool water – not ice-cold, as extreme temperatures can shock the fruit. For every cup of water, add one tablespoon of baking soda. This pantry staple is a powerhouse when it comes to breaking down pesticide residues and neutralizing acidic compounds.
Step 2: The Soak
Submerge your grapes in the baking soda solution and let them soak for 5-10 minutes. During this time, the baking soda works to break down waxy coatings and chemical residues. You might notice the water becoming slightly cloudy – that's the solution doing its job!
Step 3: Gentle Agitation
After soaking, use your hands to gently swish the grapes around in the water. This mechanical action helps dislodge dirt and debris from the crevices where stems meet the fruit. Avoid using brushes or abrasive materials, as these can damage the delicate skin.
Step 4: The Vinegar Boost (Optional)
For an extra layer of protection, especially if you're concerned about bacteria, you can follow the baking soda soak with a quick vinegar rinse. Mix one part white vinegar with three parts water, and give the grapes a 30-second dip. The acetic acid in vinegar helps kill bacteria and can dissolve mineral deposits.
Step 5: Final Rinse
Rinse the grapes thoroughly under cool running water to remove any remaining cleaning solution. This step is crucial – you want to ensure no baking soda or vinegar taste remains.
Step 6: The Drying Process
Spread the grapes on a clean kitchen towel or paper towels and gently pat them dry. For best results, allow them to air dry for 10-15 minutes before serving or storing.
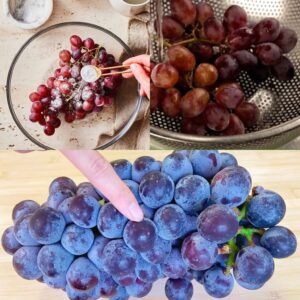
The Viral Baking Soda and Vinegar Method: Does It Really Work?
You've probably seen the viral videos showing people washing grapes with baking soda and vinegar, creating dramatic fizzy reactions that seem to magically clean the fruit. But does this popular method actually live up to the hype? Let's break down what's really happening and whether it's worth your time.
The science behind this method is actually quite sound. When baking soda (a base) and vinegar (an acid) combine, they create a chemical reaction that produces carbon dioxide bubbles. While the fizz might look impressive, the real cleaning power comes from the individual properties of each ingredient. Baking soda is excellent at breaking down pesticide residues and neutralizing acidic compounds, while vinegar's acetic acid can kill bacteria and dissolve mineral deposits.
However, there's a catch: when you mix baking soda and vinegar together, they essentially neutralize each other, creating a solution that's mostly water with some sodium acetate. This means the dramatic reaction you see is more about visual appeal than enhanced cleaning power. The most effective approach is to use baking soda for the main soak, then follow with a separate vinegar rinse if desired.
Many food safety experts recommend this two-step approach precisely because it allows each ingredient to work at its full potential. The baking soda soak tackles the tough pesticide residues and waxy coatings, while the vinegar rinse provides additional antimicrobial protection. This method has gained viral popularity not just for its effectiveness, but also because it uses common household ingredients that are safe, inexpensive, and environmentally friendly.
Expert Tips for Removing the "Bloom" and Getting Picture-Perfect Grapes
That white, powdery coating on grapes – the "bloom" – might be natural, but many people prefer their grapes to look shiny and clean, especially when serving guests or using them in recipes. The good news is that the thorough washing method we've discussed will naturally remove most of this coating. However, if you're dealing with particularly stubborn bloom or want that extra-clean appearance, here are some expert techniques:
The Salt Scrub Method
After your initial baking soda soak, create a paste using coarse salt and a small amount of water. Gently massage this paste over the grapes, paying special attention to areas where the bloom seems most concentrated. The salt acts as a gentle abrasive that can help lift the waxy coating without damaging the fruit. Rinse thoroughly afterward to remove all salt residue.
The Lemon Juice Trick
For grapes that need to look their absolute best (think fruit platters or decorative garnishes), try a final rinse with diluted lemon juice. Mix one tablespoon of lemon juice with two cups of water and give the grapes a quick dip. The citric acid helps break down any remaining bloom while adding a subtle shine. Just be sure to rinse with plain water afterward to prevent any citrus flavor from lingering.
Temperature Considerations
Interestingly, the temperature of your rinse water can affect how easily the bloom comes off. Slightly warm water (think room temperature rather than cold) can help dissolve the waxy coating more effectively. However, avoid hot water as it can begin to cook the grapes, affecting their texture and flavor.
Storage Secrets: Keeping Your Clean Grapes Fresh Longer
You've invested time and effort into washing your grapes thoroughly – now let's make sure that hard work pays off with optimal storage techniques. The way you store your grapes after washing can mean the difference between enjoying them for a week or watching them wilt in just a few days.
The Paper Towel Method
After washing and drying your grapes thoroughly, line an airtight container with paper towels. The paper towels will absorb any excess moisture that could lead to premature spoilage. Place the grapes in the container and add another layer of paper towels on top before sealing. This creates a moisture-controlled environment that helps maintain freshness.
The Breathable Bag Technique
If you prefer to keep your grapes in their original packaging, try this hack: poke a few small holes in the bag to improve air circulation. Then, place the entire bag in a larger resealable plastic bag with a folded paper towel. The outer bag prevents moisture loss while the paper towel controls excess humidity.
Temperature and Humidity Control
Grapes thrive in cold, humid environments – but not too humid. The ideal storage temperature is between 32-35°F (0-2°C), which is actually colder than most refrigerator settings. If your fridge has a humidity-controlled crisper drawer, set it to high humidity for grapes. This combination of cold temperature and proper humidity can extend grape freshness by up to 50%.
The Separation Strategy
One bad grape really can spoil the whole bunch. Inspect your grapes carefully after washing and remove any that show signs of damage, bruising, or beginning decay. These compromised grapes release ethylene gas and moisture that can accelerate spoilage in their neighbors.
Common Mistakes to Avoid When Washing Grapes
Even with the best intentions, it's easy to make mistakes when cleaning grapes that can actually compromise their safety or quality. Here are the most common pitfalls and how to avoid them:
Using Soap or Detergent
This is perhaps the most dangerous mistake people make. Grapes are porous and can absorb soap residues, which can cause digestive issues and alter the fruit's natural flavor. Always stick to food-safe cleaning methods using baking soda, vinegar, or just plain water.
Washing Too Far in Advance
As mentioned earlier, washing grapes too early introduces moisture that promotes mold growth. Even if you dry them thoroughly, some moisture remains in the crevices and stem areas, creating a breeding ground for bacteria.
Using Hot Water
Hot water might seem like it would clean better, but it can actually begin to cook the grapes, making them mushy and altering their flavor profile. Always use cool or room temperature water for the best results.
Skipping the Final Rinse
After using any cleaning solution, a thorough final rinse is essential. Residual baking soda can leave a bitter taste, while vinegar can make grapes taste sour. Take the time to rinse well under running water.
Not Drying Properly
Excess moisture is the enemy of fresh produce. Failing to dry grapes thoroughly after washing can lead to rapid spoilage, even in the refrigerator. Take those extra few minutes to pat them dry or use a salad spinner for efficient water removal.
Budget-Friendly Grape Washing: Saving Money While Staying Safe
Eating clean doesn't have to break the bank, and washing grapes effectively can actually be one of the most cost-efficient ways to ensure food safety. Here's how to maximize your grape-washing routine while keeping your budget in check:
DIY Cleaning Solutions
Commercial produce washes can cost $5-10 per bottle, while a box of baking soda costs less than $1 and can clean hundreds of batches of grapes. Similarly, white vinegar is one of the most economical cleaning agents available, often costing less than $3 per gallon – that's enough for months of produce cleaning.
Bulk Buying Strategies
If you consume grapes regularly, consider buying in bulk when they're in season and on sale. A thorough washing routine becomes even more valuable when you're dealing with larger quantities. You can wash and portion them for the week, saving both time and money compared to buying smaller, more expensive packages.
Reducing Food Waste
One of the biggest money-saving aspects of proper grape washing is waste reduction. When grapes spoil quickly due to improper cleaning and storage, you're essentially throwing money away. By extending the life of your grapes through proper washing and storage techniques, you can reduce your grocery budget significantly over time.
The Organic Debate
While organic grapes have lower pesticide residues, they're often 50-100% more expensive than conventional ones. A thorough washing routine can make conventional grapes much safer to eat, allowing you to enjoy this nutritious fruit without the premium price tag of organic options.
Conclusion: Your Path to Perfectly Clean, Safe, and Delicious Grapes
Mastering the art of grape washing is more than just a kitchen skill – it's an investment in your health, your taste buds, and even your wallet. By understanding the science behind grape cleaning, timing your washing correctly, and using proven methods like the baking soda soak followed by a vinegar rinse, you can transform ordinary grapes into extraordinary fruit that's safe, clean, and bursting with flavor.
Remember, the goal isn't just to make grapes look pretty – it's to remove harmful contaminants while preserving the fruit's natural goodness. Whether you're dealing with conventional grapes that need thorough pesticide removal or simply want to ensure your organic grapes are as clean as possible, these techniques will serve you well.
The next time you bring home a bunch of grapes, resist the urge to give them a quick rinse and call it a day. Instead, take a few extra minutes to give them the thorough cleaning they deserve. Your body will thank you, your taste buds will celebrate, and you'll never look at those dusty little fruits the same way again. Here's to enjoying grapes that are so clean, they're practically naked – and absolutely delicious!